
The most original-looking wiring choice isn’t always the right fit for a restored classic. A replacement harness may include a fuse block, switches, fuses, relays, flashers, connectors, terminals, and installation instructions. Upgrading a classic car wiring harness means deciding whether a factory-style layout suits the build or a customization-oriented system better supports modern components.
That choice shapes more than the wiring beneath the dash. A factory-style approach can preserve familiar routing and original character, while a tailored system can accommodate updated electrical needs without losing the car’s distinctive feel. Either way, careful labeling, routing, connections, and testing are essential to a clean, dependable installation.
Learn what a replacement harness may include, how to organize and route wires during installation, and which details help determine the right system for your restoration. The goal is to preserve the classic experience while giving the car an electrical foundation suited to how you plan to drive it.
Key Takeaways
- A replacement harness can bring together a fuse block, switches, fuses, relays, flashers, connectors, terminals, and installation instructions.
- Label old and replacement wires as you compare them, then route the harness clear of heat and protect any passage through sheet metal.
- Choose a factory-style layout to preserve familiar wiring, or a customization-oriented system to better accommodate modern components.
- Installation cost depends on the vehicle, harness fit, electrical changes, and labor involved; Elite Restomods’ Custom Build Services can support a broader restoration vision.
Included switches, connectors, terminals, and instructions
The Classic Update Series brings key components together in one replacement system: a fuse block, switches, fuses, relays, flashers, connectors, terminals, and installation instructions. Before removing original connections, review the circuit labels and diagrams. Use the documentation to identify each wire’s destination as you install the harness.
For harness work, gather wire strippers, a terminal crimper, masking tape, and a multimeter. You’ll also need replacement connectors and terminals, protective wrap, and rubber grommets. Use the vehicle’s wiring diagram and the harness instructions to match each circuit. These tools help you prepare, label, connect, and test the wiring.
Select sealed bulkhead connectors based on circuit needs, connector positions, and the space available at the panel. One proposed 1963 Imperial layout used a 22-position Weather-Pack bulkhead. Its switched and unswitched circuits were intended to carry 60 amps each, while Weather-Pack connections were described as rated for 20 amps. Those figures refer to different parts of the proposed arrangement, so don’t treat them as interchangeable. Metri-Pack 280 connectors selected for another project were rated at 30 amps per connector. Metri-Pack ratings range from 14 to 60 amps, depending on model.
Inspect bulkhead connections for corrosion, loose terminals, damaged seals, and heat discoloration. Corrosion can compromise electrical contact, so clean or replace affected terminals before reconnecting wires. A new headlight switch is recommended during rewiring because dirty or corroded contacts can overheat. Match connector type and capacity to the circuit, not just its appearance.
Reduce rewiring risks by disconnecting the battery before work and protecting unfused power feeds. Accessories connected directly to the battery or ignition switch need a fuse or circuit breaker at the power source if no other circuit protection is present. A fusible link between the battery and main loom is also recommended. Use relays for moderate- or high-amperage accessories when a switch can’t handle the load, and test each harness leg as you go.
Labeling and routing replacement harness wires
Before removing the original harness, compare each old wire with its replacement. Mark both with masking tape and note the circuit and destination, such as “left turn signal” or “dash illumination.” Photograph connectors and branch locations before disassembly. These references help you trace a wire if its color or route differs from the original.
Route one harness leg at a time, following the vehicle’s original paths where practical. A Classic Update Series installation isn’t completely plug-and-play: wires may need routing and trimming before terminals and connectors are fitted. Keep wiring away from headers and exhaust components, and use temperature-resistant wrap where heat is a concern. Fit a rubber grommet wherever wires pass through a steel panel to prevent chafing.
To add electronic ignition, air conditioning, or EFI, identify each accessory’s power and signal connections in its instructions. Match them to the harness circuits and plan the routes before trimming wires. This helps integrate new equipment without confusing accessory wiring with the vehicle’s original circuits.
Where the layout allows, keep power wires separate from sensitive signal wiring. For example, route an ignition signal lead away from a high-current accessory feed, and secure both away from sharp edges and moving parts. Leave enough slack at components for service access, but avoid loose loops near steering or pedal mechanisms.
Test each harness leg as installation progresses instead of waiting until every connection is complete. Use a multimeter to check continuity and voltage, then trace an inoperative light or accessory through its connector, ground, and circuit path. A failed test narrows the search to that section, helping distinguish a loose terminal from a routing or connection error.
For help aligning wiring decisions with a wider restoration plan, explore the restoration process.
Choosing between a factory-style harness and a customization-oriented wiring system
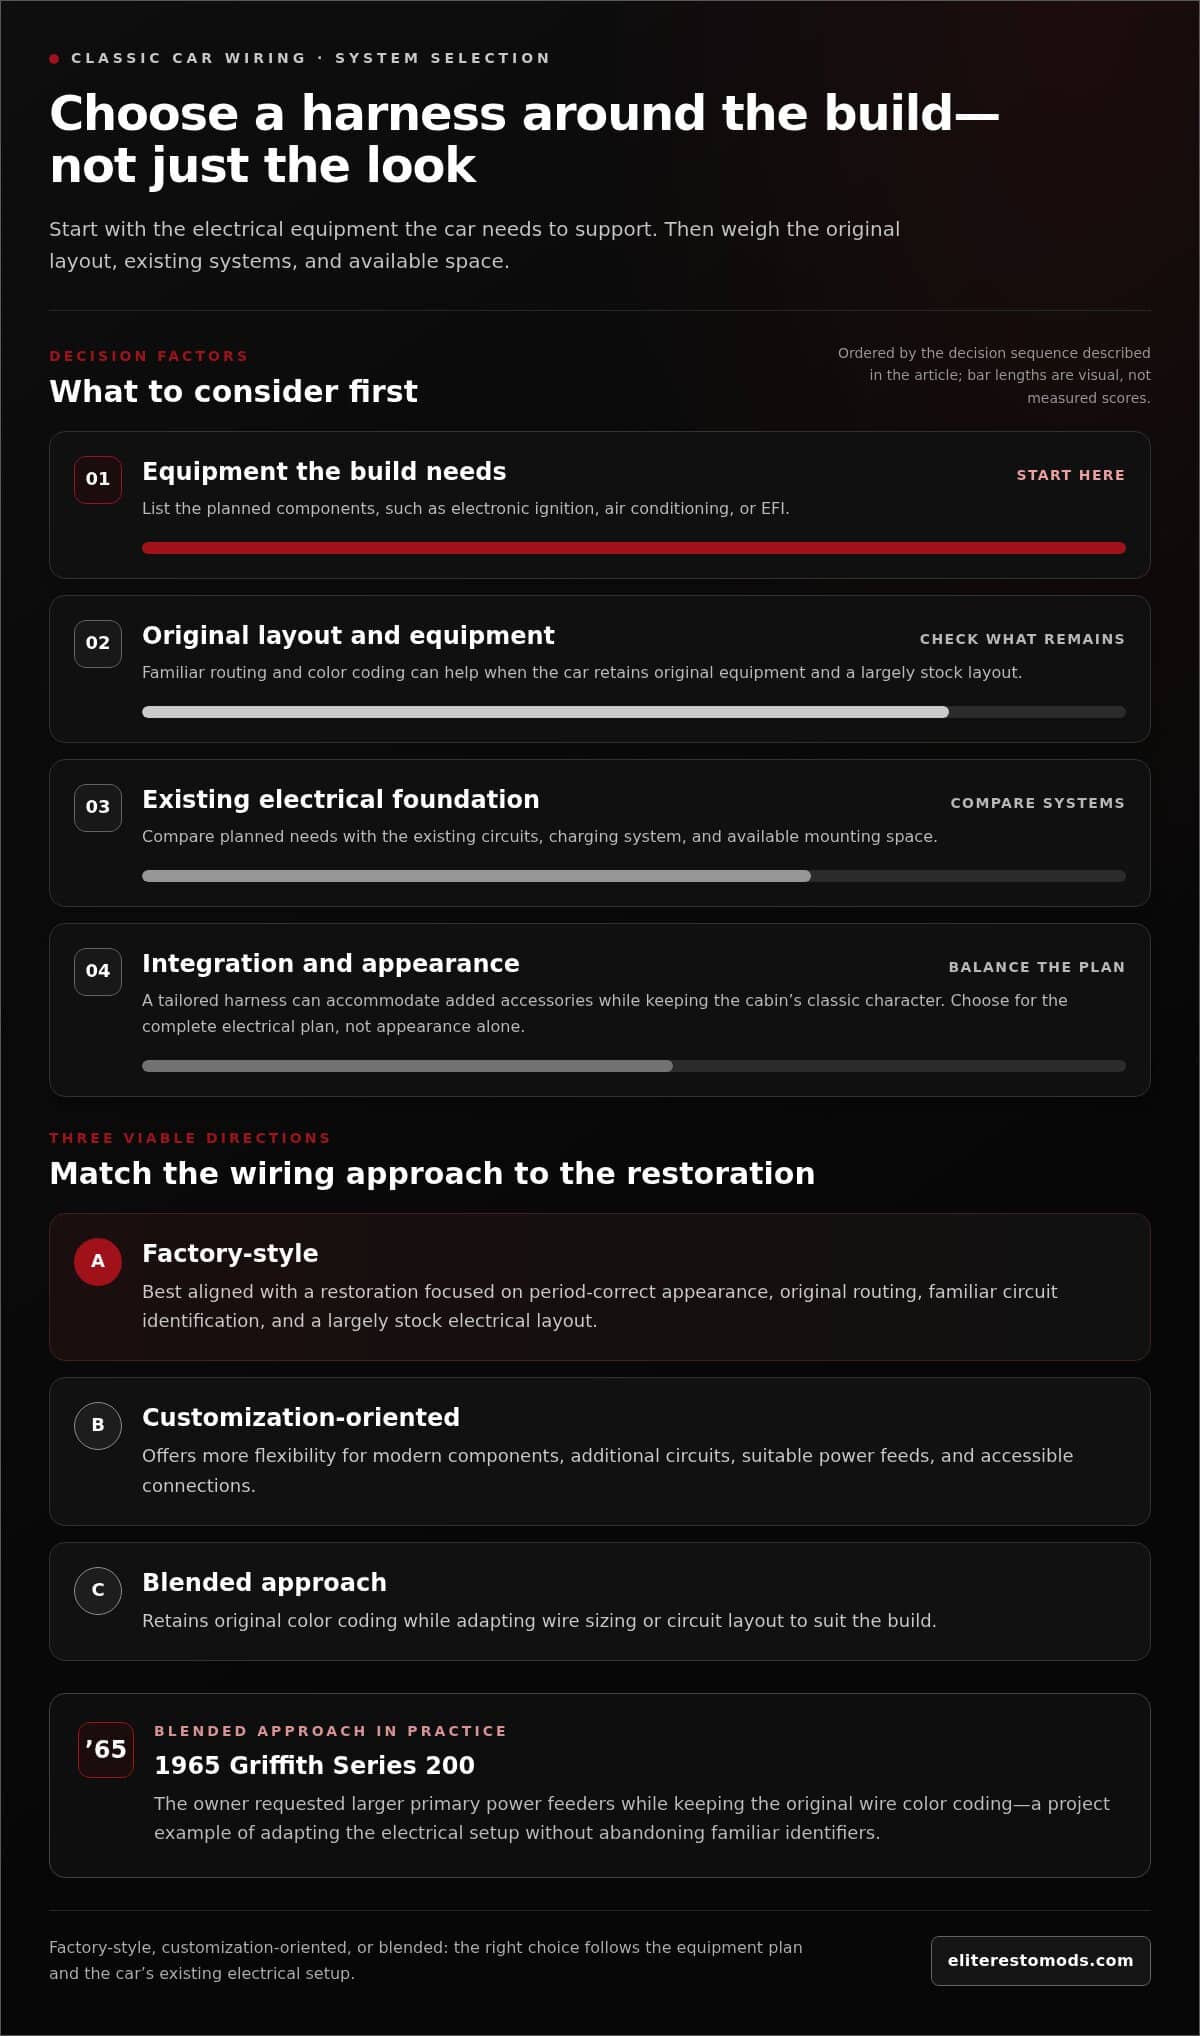
A factory-style harness follows the vehicle’s original layout and can suit a restoration focused on period-correct appearance. A customization-oriented system offers more flexibility for modern components. Since vintage wiring wasn’t designed for today’s technology, start by listing the equipment your build needs to support, such as electronic ignition, air conditioning, or EFI.
Compare that list with the existing circuits, charging system, and available mounting space. If the car retains original equipment, familiar routing and color coding can simplify integration. If the build adds accessories, a tailored harness can support those changes while preserving the cabin’s classic character. Choose based on the complete electrical plan, not appearance alone.
Use these decision points:
- Keep factory-style: prioritize original routing, familiar circuit identification, and a largely stock electrical layout.
- Customize: plan additional circuits for modern components, suitable power feeds, and accessible connections.
- Blend both: retain original color coding while adapting wire sizing or circuit layout to the build.
A 1965 Griffith Series 200 project illustrates that blended approach: the owner requested larger primary power feeders while keeping original wire color coding. A Classic Update Series system also supports a 1-wire alternator, an example of a modern charging arrangement within a replacement harness. These examples show why the decision should account for individual components and wiring priorities.
For a U.S. classic, inspection and insurance conditions depend on the state and policy. Treat a harness replacement as an electrical change, and keep emissions-related equipment separate from wiring decisions. Don’t assume a wiring upgrade permits emissions components to be altered.
Before choosing a harness, list the factory equipment you’ll retain, planned additions, and preferred appearance. Match each item to the system’s circuits and installation approach. A factory-style harness suits preservation-led builds; a customization-oriented system suits projects with modern electrical demands. Either works best when the diagram, component plan, and finished installation align.
How much does a classic car wiring harness cost, including installation?
The total cost combines the replacement harness, installation labor, and any added electrical work. There’s no single useful price for every classic car. The make, model, harness design, and condition of existing wiring all affect the scope. A straightforward replacement differs from a build that adds modern accessories or alters circuits.
The total depends on the vehicle, harness scope, access, and labor, and is established after a quote request. A clear estimate should separate the harness from labor and additional components. It should also describe the included work, such as removing old wiring, fitting terminals, connecting circuits, and testing each harness leg.
Before comparing estimates, note the project details that shape the work:
- Vehicle and harness: identify the model and whether the system follows factory routing or needs customization.
- Existing condition: note damaged wiring, corroded connections, or previous modifications that could require extra tracing.
- Planned equipment: list additions such as electronic ignition, air conditioning, or EFI, since each may affect circuit planning.
- Installation scope: clarify whether labor includes removal, routing, connector fitting, and electrical testing.
Access can affect labor. A crowded dashboard, tight engine bay, or altered interior may require more careful disassembly and routing than an accessible, largely original layout. Previously modified wiring can also complicate circuit identification. Record these conditions before estimating so the scope reflects the vehicle, not a generic installation.
DIY installation can reduce paid labor, but the owner is responsible for routing, connections, and testing. Professional installation includes skilled time for these tasks, with project complexity shaping the labor portion. Compare estimates by scope, not just the bottom line. An estimate that excludes accessory circuits or final testing may not cover the same work.
For broader restoration budgeting, explore classic car financing options. Financing can support a vehicle project’s budget, while a detailed wiring estimate clarifies the electrical work involved.
Elite Restomods: Elite Certified Restomods
Elite Restomods offers Custom Build Services for owners shaping a classic around a broader restoration vision. If a wiring upgrade is part of a larger build, this service can bring electrical decisions into line with the vehicle’s intended character and use. Choose the harness alongside the engine, accessories, interior, and driving goals.
For enthusiasts considering a completed vehicle, Elite Certified Restomods have undergone a quality assurance process. This can be a useful route if you want a classic already brought into a finished, considered form rather than planning an individual restoration. Each path offers a different starting point: a custom build develops your vision, while a certified restomod is a curated vehicle.
Contact Elite Restomods to discuss the right direction for your classic car plans.
Shape the next chapter of your restoration
Choices about upgrading a classic car wiring harness are part of a larger vision for how the vehicle will look, feel, and drive. Decide what you want to preserve and modernize, then carry that direction through the rest of the build. A considered electrical plan can support the car’s character while preparing it for contemporary use.
Elite Restomods offers Elite Certified Restomods, a Consignment Program, and Custom Build Services for different restoration journeys. Whether you’re planning a tailored build or considering another path for your classic, keep the vehicle’s intended use at the center of each decision.
To discuss how your harness plans fit into a broader restoration, contact Elite Restomods about your project. Keep the vision clear, make each choice with purpose, and let the finished classic earn its place on the road.
Frequently Asked Questions
How do I choose the right wiring harness for a classic car make, model, and year?
Match the harness to the car’s make, model, year, and electrical configuration. Compare its circuit layout with the vehicle’s current equipment and modifications. For example, an engine swap or added EFI can change the circuits required, even if the body and model year remain original. Record those changes before choosing a system, and use the harness diagram to confirm circuit destinations.
What are the differences between a universal and vehicle-specific classic car wiring harness?
A vehicle-specific harness is organized for a particular application, while a universal system is adapted during installation. With a universal harness, the installer typically determines branch locations, wire lengths, and connection points to suit the vehicle. That flexibility can help with extensive modifications but requires careful planning. A specific-fit design may align more closely with factory locations, though you’ll still need to account for modifications.
What are the steps for removing and installing a classic car wiring harness?
Work methodically and keep a clear record of the original connections:
- Disconnect the battery and photograph connectors, grounds, and routing.
- Label circuit ends, then remove old wiring without cutting reusable connections prematurely.
- Position the replacement harness, connect grounds, and secure each branch along its route.
- Install terminals, connect circuits, and test lights and accessories individually before refitting trim.
Keep the wiring diagram beside the vehicle and check each connection before restoring power.
What wire gauge, fuse ratings, and circuit protection should a classic car harness use?
Choose wire gauge and fuse protection for each circuit’s load, component, and wire capacity; there isn’t one rating for every vehicle. A proposed 1963 Imperial charging upgrade paired a 60-amp alternator with a change from 12-gauge to 6-gauge wire. That example isn’t a universal specification. Size each circuit independently, and place a fuse or circuit breaker near the power source when protection is otherwise absent.